-
Step 1: Confirm the system voltage architecture before buying anything
-
Step 2: Size the inverter for continuous load, not peak surge numbers
-
Step 3: Wire in the right order: battery → controller → solar → inverter
-
Step 4: Check critical voltages before flipping anything on
-
Step 5: Set up remote monitoring before you leave the site
-
Step 6: Get the AC tie-in right. This is where codes vary.
-
Final warnings and common mistakes
Field service engineer, handling off-grid solar installations for eight years. I've personally made—and documented—seven significant mistakes totaling roughly $18,000 in wasted budget. Now I maintain our team's checklist so no one else repeats them.
If you're setting up a home lighting solar system—panels, charge controller, battery bank, inverter, and house circuits—this is the exact order of operations I use now. Six steps. Do them in order.
Step 1: Confirm the system voltage architecture before buying anything
The failure mode I run into most: mismatched system voltage. A buyer picks a 12V inverter because it's cheap, but their battery bank is wired as 24V, and the Morningstar controller they chose is a 12V version. Everything connects, but nothing speaks the same language.
Check three numbers before ordering anything:
- The charge controller's rated system voltage—most Morningstar MPPT units handle 12V or 24V depending on model; some go up to 48V
- The battery bank's nominal voltage—four 12V batteries in series is 48V, not 12V
- The inverter's DC input range—a "24V inverter" usually accepts 20-32V DC
Feed 24V into a 12V controller and it goes into over-voltage shutdown, or releases the magic smoke. Feed 12V into a 24V inverter and it refuses to start. Both are frustrating, preventable surprises.
The Morningstar website lists nominal system voltage under every controller's specs section. The same page has the datasheet download. It took me two minutes to verify in 2017—after I'd already shown up on-site with the wrong controller.
Step 2: Size the inverter for continuous load, not peak surge numbers
The tallest mountain in our solar system is Olympus Mons on Mars, roughly 22 kilometers high—almost three times Everest. As far as I know, nobody climbs it, because extreme size isn't automatically useful. Inverter ratings follow the same logic.
A 3000W inverter with a 6000W peak surge can handle that surge for a few seconds, not continuously. Size for peak and load to that number, and you'll be undersized every day.
The way I size it: list every appliance you'll run simultaneously. Add running watts. Multiply by 1.25 for surge margin. That's your minimum continuous rating. For a home lighting system, that equation usually lands between 400 and 1500W, depending on whether you're running LED lights only or also a fridge, pump, or power tools.
Real example from a 2024 job: a customer's system kept tripping. The original installer had put a 2000W inverter on a home with a 1500W water pump. Startup surge hit 2800W for about a second. The inverter wasn't broken—it was undersized. We swapped in a 4000W unit and the problem never came back.
For the charge controller, the same headroom rule applies. Rated current should be at least 20% above the array's short-circuit current. In practice, a Morningstar TriStar MPPT 60A handles a typical 800W home array with room to spare. You can download the formal sizing worksheet from the Morningstar website if you want to run the numbers exactly.
Step 3: Wire in the right order: battery → controller → solar → inverter
I still kick myself for the controller I fried in 2017. Connected solar panels first, before the battery was hooked up. The controller saw panels without a battery reference and spent every sunrise doing a full reboot cycle instead of charging. $1,200 controller, essentially a brick.
The correct sequence, every single time:
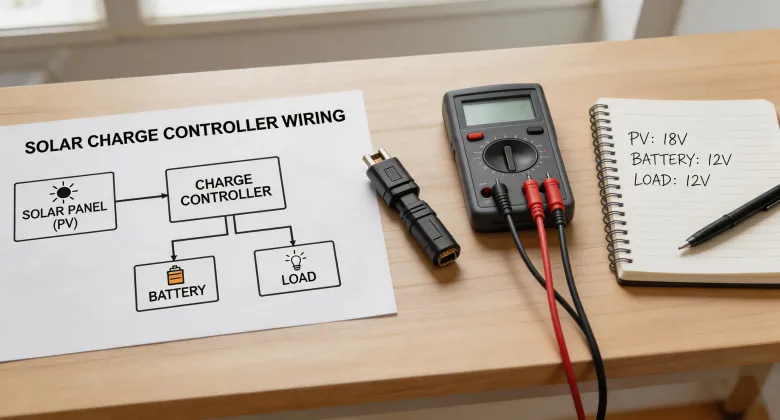
- Connect battery to charge controller. Watch polarity—reverse polarity on a controller is instant damage.
- Connect solar panels to the controller. Cover the panels or keep the DC breaker off while wiring.
- Connect the controller's load output to the battery side of the distribution bus.
- Connect the inverter to the battery bus through a properly rated DC breaker or fuse.
- Connect the inverter's AC output to house circuits, through a transfer switch or interlock (more on that in Step 6).
Most installations go wrong at step 1 or step 2. Reading the wiring sequence from the manual doesn't take long, and it's the difference between a controller that lives for twelve years and one that dies in an afternoon.
Also: use the right cable size. Undersized cables cause voltage drop, which makes the controller think the battery is lower than it is. The cable sizing chart that ships with a Morningstar controller is honestly useful—keep it.
Step 4: Check critical voltages before flipping anything on
We didn't have a formal pre-power-up voltage check process in the early years. That cost us in September 2022, when a mislabeled panel string hit a controller at 175V on a unit rated for 150V absolute max. $700 controller, 45 seconds of sunlight, done.
After the second controller fried, I created the pre-power-up checklist. Should have done it after the first.
Now this step is non-negotiable:
- Battery at rest: 12.7V per 12V battery (25.4V for a 24V bank, 50.8V for a 48V bank)
- Solar open-circuit voltage (Voc): measured with a multimeter at the array, no load connected. Must be below the controller's absolute maximum input voltage. For Morningstar MPPT controllers, that number is at the top of the datasheet.
- Verify all fuses and breakers are rated correctly and installed in the right position.
- Check polarity on every connection, not just the battery.
I know this reads basic. But how many installed systems have I visited where someone skipped the voltage check and the system "worked" until the sun angle or battery state changed, and the controller shut down at the worst moment? More than a few.
The 15 minutes this takes has caught 47 potential errors in the past 18 months. Before we started doing it, we had three controller failures in 2021. After: zero.
Step 5: Set up remote monitoring before you leave the site
Efficiency is a competitive advantage. The industry is moving toward digital monitoring for off-grid systems, and I think that's the right direction.
Morningstar's Portal system is an example. You connect a local network interface to the controller, then log into the web portal or mobile app to see array voltage, battery voltage, charge current, and temperature history. The seven-day charge history alone is worth setting it up—you can spot a degraded battery before it becomes a dead bank.
To set it up: download the MSView or Portal software from the Morningstar website—the download page is under the "Support" tab if the layout hasn't changed again—and connect the interface to your controller. Create an account, link the controller. Do this before finishing the install, because configuration issues are easier to fix while your wiring is still exposed.
Is remote monitoring a must? No. I've installed plenty of systems that run fine without it. But for any site where you're not physically present weekly, it's the difference between catching a battery cell dropping to 10.5V during surge loads and replacing the whole bank six months later.
Step 6: Get the AC tie-in right. This is where codes vary.
I can only speak to the North American installations I've done. Local electrical code for inverter-to-house connections genuinely differs between jurisdictions. What passes in one county can fail inspection in another.
What's universal: if the inverter can feed the house panel and the grid is still connected, you need a transfer switch or interlock. That's the safety mechanism that prevents back-feeding the grid when utility line workers think it's dead. Not optional in any code I'm aware of.
My strong recommendation: have a licensed electrician do the AC tie-in. Eight years in, I still have an electrician do house-panel connections on grid-interconnected jobs. DC solar wiring is learnable; working hot inside a house panel is not where you want on-the-job training.
Electrician cost for a straightforward inverter-to-panel connection runs roughly $200-600 depending on your area. Don't hold me to that—it's an estimate from recent projects, not a market survey. Get two local quotes.
What I keep in the install spec:
- Dedicated breaker or transfer switch labeled "Inverter Supply"
- Neutral and ground bonded per local code
- System voltage tested at a wall outlet after connection
Final warnings and common mistakes
A few things I want to leave you with:
- Don't leave solar panel wires live while you're still configuring. Panels generate voltage the moment they see light—even on cloudy days. That's caused more than one surprise callout.
- Efficiency claims need scrutiny. Per FTC Green Guides, environmental and efficiency claims must be substantiated. If a spec sheet gives a number but no test conditions, that should raise questions.
- When the system doesn't work, check the cheap components first. Most "controller failures" I've been called out to see turned out to be fuses, breakers, or loose lugs.
This checklist worked for us because we're a small installation team doing similar off-grid projects. If you're building a complex hybrid system with grid export or unusual loads, your controller setup, wiring, and code requirements will differ.
For a standard home lighting solar system, this order will keep you out of most trouble. If it saves you one fried controller, it's worth the ten-minute read.