-
When This Checklist Applies
-
The Seven-Step Checklist
-
Step 1: Build the Load Table First
-
Step 2: Use Real Sun Hours, Not Marketing Math
-
Step 3: Price Batteries by Delivered Cost per Cycle
-
Step 4: Size the MPPT Controller for the Array's Voc, Then Verify What You Received
-
Step 5: Set Up Remote Monitoring Before Commissioning
-
Step 6: Do a Staged Test Before Full Load
-
Step 7: Put Buffer Time on the Budget
-
Step 1: Build the Load Table First
-
Mistakes That Turn Small Problems Into Emergencies
My phone rang at 8:15 on a Sunday morning in March 2025. The installer on the other end had 36 hours before a site inspection, and the new Morningstar controller on the wall wouldn't connect to its remote monitoring app. It turned out to be a communication wiring mistake, but it nearly cost the whole project.
I've coordinated off-grid solar equipment for B2B integrators and installers for nine years. Rush orders are basically my specialty. After 200+ emergency deliveries—maybe 215? I stopped counting—I can tell you that most panics share the same root cause: someone skipped a step in the planning checklist.
Here's the checklist I wish those customers had used. It's seven steps, built for teams putting together real off-grid solar systems, not for backyard experiments.
When This Checklist Applies
Use this list when the timeline is tighter than you'd like and you're designing off-grid power for an actual site. The projects it fits best are:
- Remote telecom and IoT sites that need 24/7 uptime
- Cabins, gatehouses, or ranch power in the 2–10 kWh range
- Agricultural water pumping and control systems
- Temporary or disaster-relief power installs
If you're engineering a megawatt-scale PV plant, this checklist is probably too simple for you. If you're the person expected to make a 48-volt system work without a dedicated engineering team, keep reading.
The Seven-Step Checklist
Step 1: Build the Load Table First
Almost every solar system project idea that shows up in my inbox starts with a vague phrase like "we just need to keep the site online." The actual load list arrives later, sometimes after the batteries have already shipped.
Don't be that team. For every device, write down:
- Operating voltage
- Average watts while running
- Running hours per day
- Starting surge for motors, pumps, and compressors
And don't forget the invisible loads. I took a call from a client who needed power for "a few LED lights and a laptop." They left out the 1,200-watt space heater and electric kettle. That system had to be resized in a rush, and the extra shipping cost alone ate any savings from the budget battery they'd chosen.
Checkpoint: If your peak load is more than triple your average load, the battery and inverter both need to handle the peak. No exceptions.
Step 2: Use Real Sun Hours, Not Marketing Math
Consumer solar has trained people to expect the wrong things. Look at the Garmin Fenix 7 solar battery life, for instance. It's genuinely impressive when the watch sits in direct sun all day, because the tiny solar cell can offset normal power draw. But the moment the watch spends days indoors or under heavy cloud cover, that impressive battery life disappears. The stored charge is doing the real work.
An off-grid battery bank works exactly the same way. The panels only refill it when the sun is actually hitting them. So use the average peak sun hours of the worst month at your site, not the annual average. Design the array and battery to get through that rough stretch.
Checkpoint: When someone says "solar will handle it," ask to see the peak sun hours for December or January at the site's latitude. If they don't have that number, you're not ready to order hardware.
Step 3: Price Batteries by Delivered Cost per Cycle
"How much do solar panel batteries cost?" gets asked wrong most of the time. The simple answer—so many dollars per kilowatt-hour—doesn't tell you what you actually need to know. The useful answer is the total cost per kilowatt-hour delivered over the battery's lifetime.
Let's use a rough example from quotes I reviewed in Q1 2025. One flooded lead-acid bank came in at about $500 for 5 kWh of rated capacity. It's built for roughly 500 cycles at 50% depth of discharge, which adds up to around 1,250 usable kWh over its life. That works out to about $0.40 per usable kilowatt-hour.
A lithium iron phosphate bank with the same 5 kWh rating was around $1,500 upfront. It gives you 3,000+ cycles at 90% depth of discharge, so the usable lifetime energy is closer to 13,500 kWh. That's roughly $0.11 per usable kilowatt-hour. Yes, the LFP bank costs three times more at the counter. It also costs about a quarter as much per unit of energy actually delivered.
I'm not saying lead-acid is always the wrong call. If you need backup power for occasional weekends, the cheap bank might be the better total-cost decision. Just make that decision with the per-cycle number in front of you, not the sticker price. And keep in mind that battery prices shift with the market; your local supplier may quote something different. Use the calculation method, not my example numbers.
Checkpoint: Divide the full battery quote by the watt-hours it will deliver over its expected life. Compare vendors on that number.
Step 4: Size the MPPT Controller for the Array's Voc, Then Verify What You Received
The charge controller is where many of my urgent calls start. If the array voltage exceeds the controller's maximum PV input voltage, the controller can be damaged on a cold sunny morning. Cold panels produce higher voltage, so this is not a detail you can ignore. The data sheet is the only source that matters; match your panel string against the controller's rated PV input limit.
On remote sites, we standardize on Morningstar charge controllers. The MPPT technology is proven, and in our experience the failure rate is low. But no purchase should be a trust exercise. When the box arrives, inspect the controller before mounting it. Look at the Morningstar logo on the label: it should be sharp, evenly printed, and consistent with the official logo on Morningstar's website. Check that the serial number on the label matches the packaging and the paperwork.
If anything looks off, contact the supplier before you install it. A fake or mismatched controller can fail at the worst moment, and the cost of a return visit will dwarf the money you saved on the deal.
Checkpoint: Verify the serial number and the controller's ratings before you put it on the wall.
Step 5: Set Up Remote Monitoring Before Commissioning
Monitoring is usually an afterthought, but it's the first thing you need when a site goes down. For a Morningstar system, that means creating the remote monitoring account before you leave the warehouse. Set up your Morningstar login in the Portal and add the controller serial number while the manual is still in front of you.
This sounds small, but I've seen commissioning delays caused by a forgotten password or an account tied to someone's personal email. Write the admin credentials down in a place the company can access after the project ends. A monitoring account locked to one person's inbox becomes a nightmare the day that person changes jobs.
Checkpoint: Log in, confirm the controller is reporting real voltage and current data, and share access with at least one backup person.
Step 6: Do a Staged Test Before Full Load
It's tempting to connect everything, flip the breaker, and call it done. Don't. The projects that fail in the first week usually fail because nobody tested the system in stages.
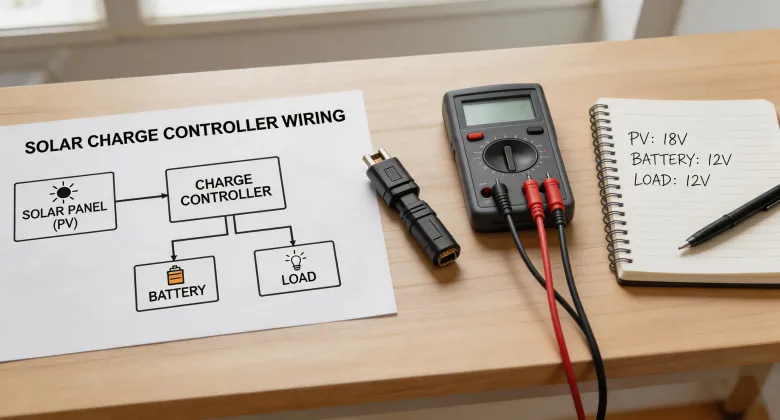
Start with the battery bank alone. Let it charge fully and confirm the voltage readings match between the multimeter and the controller. Then connect a small test load and watch the controller switch between charging and discharging states. Only after that should you connect the real loads.
Staged testing also gives you a chance to catch obvious wiring mistakes without drawing full power. The 30 minutes you spend testing at the shop or on a calm day can save a 2 a.m. trip later.
Checkpoint: If the system has not run for at least 24 hours under a real load before handover, the project isn't finished.
Step 7: Put Buffer Time on the Budget
This is the step that sounds strange coming from someone who handles emergency orders. But the whole reason I get emergency calls is that buffer time was treated as an optional expense.
In total-cost thinking, buffer time is insurance. Paying $650 for overnight freight on a replacement controller feels painful until you compare it to the cost of a site going dark for three days. One client paid about $900 in expedited shipping because the first controller arrived damaged. That was annoying. Losing the contract would have been far more expensive.
Build at least one extra day into every step of the schedule that involves shipping or installation. If you never use that buffer, consider yourself lucky. If you do use it, it'll be the cheapest part of the project.
Checkpoint: When you review a project plan, ask what happens if the last delivery is delayed by two days. If the answer is "we're in trouble," add buffer now.
Mistakes That Turn Small Problems Into Emergencies
Here are the recurring mistakes I still see on rushed projects:
- Sizing the battery for the average day instead of the worst stretch of weather.
- Choosing a battery solely on the upfront quote. The lowest price per kilowatt-hour is not the lowest cost per cycle.
- Installing a charge controller without verifying the serial number and ratings against the official documentation.
- Leaving remote monitoring setup until after the inspection is scheduled.
- Skipping the staged test because "we've done this before."
One more thing: I'm not a licensed electrical engineer, so I won't pretend to cover every local code or utility requirement. If your system connects to the grid, have a qualified professional review the design before you buy hardware. That review is also part of the total cost. Skipping it to save a few hundred dollars is a bad trade.
Bottom line: high-pressure jobs expose weak planning. The projects that go sideways rarely fail because of one dramatic design mistake. They fail because of small, checkable details: the wrong sun-hours number, a battery priced without cycle life, a controller that wasn't verified, or a monitoring login that didn't exist until it was too late.