-
The Day I Treated a Solar System Like a Printer Order
-
The Austin Solar Panel Installation That Exposed My Blind Spot
-
How to Connect a Solar Panel to a Battery: The Connection Order That Works
-
Why the Austin Solar Panel Installation Finally Went Smoothly
-
Prevention Is Cheaper Than Correction
-
Five Minutes of Verification Beats Five Days of Correction
The Day I Treated a Solar System Like a Printer Order
Last July, I stood on a loading dock in Nashville holding a charge controller that was not the one we needed. The box had a Morningstar logo, the right model family, and a price that looked responsible. Then I read the manual. It said 12V DC battery. Our field station outside Austin uses a 24V battery bank.
I've been the office administrator here since 2021. I manage all field supply ordering—roughly $180,000 a year across 12 vendors, and I report to operations and finance. My internal customers are field crews who need weather-proof enclosures, monitoring gateways, and charge controllers. They don't care how many tabs I have open. They care whether the part works when they open the box.
When the project request landed, it said 'solar system for water quality site near Austin.' I pictured the planets solar system, the one with Jupiter and Saturn. The senior technician laughed and corrected me: 'Not that solar system. Panel, controller, battery, load.' That distinction became the skeleton of everything I learned.
The Austin Solar Panel Installation That Exposed My Blind Spot
By August, we had to be on-site for an Austin solar panel installation. The original plan was straightforward: two 100W panels in series, a 24V battery bank, and a Morningstar MPPT charge controller.
When I picked the controller, I focused on price and brand name. I didn't open the Morningstar download center to check the operator manual. If I had, I would have seen the battery voltage selection table on the first few pages. Instead, I ordered a controller that was designed for 12V systems. It looked perfect until someone read the label.
That was a process gap, not a technical one. We didn't have a formal spec-review checklist for solar components. I typed 'Morningstar charge controller' into a search box, filtered by price, and clicked. The controller was the correct brand and the correct model family. It was still wrong.
How to Connect a Solar Panel to a Battery: The Connection Order That Works
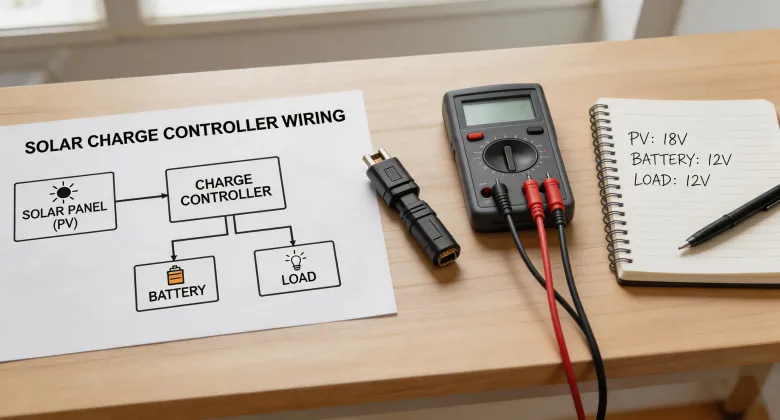
I don't want to turn a buying story into a lecture, but there's one hardware fact that every non-electrician should know: a solar panel cannot connect directly to a battery. You need a charge controller between them.
Why? A panel's voltage changes with sunlight. A 12V panel can push 18V or more in bright sun. That will overcharge a battery. The charge controller regulates voltage and current so the battery sees a controlled charging profile.
Once you have the right controller, the order is:
- Check the battery bank voltage first. 12V, 24V, and 48V systems need different controller models.
- Check the controller's maximum PV input voltage against the panel's open-circuit voltage, especially for cold morning starts.
- Connect the battery to the controller first. Then connect the panel. Then connect the loads.
- Verify polarity before powering anything. Reverse polarity can fry electronics in a second.
- Photograph the label and serial number before installation.
If you're using a Morningstar controller, the manual does a better job teaching this than I can. I keep the current TriStar MPPT manual downloaded from the official Morningstar download center on my phone. As of late February 2025, the download center still separates legacy and current products, which makes it easier to avoid old firmware files. The first time I read it, I thought: this is what a good manual feels like.
Why the Austin Solar Panel Installation Finally Went Smoothly
When the replacement controller arrived, I didn't just hand it to the crew. I made a one-page checklist and taped it to the battery box lid. It had five lines: check battery voltage, verify PV input voltage, connect battery first, connect panel second, verify polarity. The crew followed it, or at least they didn't roll their eyes visibly.
That Austin solar panel installation finished in one day. The monitoring portal showed live data by late afternoon. We avoided a second trip, which would have cost more than the controller itself.
My checklist now includes a visual logo check. Counterfeit and gray-market electronics exist in the solar world, so I compare the Morningstar logo with the official product page, verify the model number matches the manual PDF, and photograph the serial number. If anything looks off, the part doesn't go in the field.
Prevention Is Cheaper Than Correction
A lot of buyers focus on wattage and brand name and completely miss three numbers: battery bank voltage, maximum PV input voltage, and maximum charge current. I learned that the hard way.
There's also a misconception about pricing. People think a controller costs more because the brand charges a premium. Actually, a manufacturer can charge a premium because it invested in components and testing that reduce failure rates. The price is a result of reliability, not the cause of it.
Granted, you can pay too much for a brand. That happens. But if a controller is the only thing between a $4,000 battery bank and an uncontrolled charge, the controller is not the place to cut costs.
For a permanent installation, the rules in the U.S. are not just suggestions. The National Electrical Code, specifically Article 690, covers PV system disconnects and wiring requirements. The code edition adopted by your state matters, so I always ask a licensed electrician to review the design. I like Morningstar's manuals because they reference safety standards instead of pretending the physical world doesn't exist.
Five Minutes of Verification Beats Five Days of Correction
I keep that line on my whiteboard. It sounds like a slogan, but I've earned it the expensive way.
The wrong controller cost us about $1,900 when I counted labor, freight, and delayed data. The checklist took 30 minutes to make. That math is hard to argue with.
So, if you're connecting a solar panel to a battery, remember this: the physical part is simple. The discipline is hard. Check the specs. Download the manual from the official Morningstar download center. Look at the Morningstar logo. Take a photo of the serial number. Connect battery to controller, panel to controller, and loads last.
Or, as my technician would say, 'It's not the planets solar system, but it still needs the right order.'