-
Who This Checklist Is For
-
Step 1: Verify Your Voltage Headroom (Don't Trust the 'Max' Rating)
-
Step 2: Categorize Your Battery's Charging Curve (Not All 'Lead-Acid' Profiles Are the Same)
-
Step 3: Don't Oversize for 'Peak Power' — Oversize for 'Continuous Load'
-
Step 4: Verify the Communication Path Before You Close the Panel
-
Step 5: Measure Twice, Cut Once — Then Measure Again
-
Common Mistakes to Watch For
I'm a system engineer handling off-grid and microgrid installations for commercial operators. I've been doing this for about 7 years now — and I'll be honest, I made some expensive mistakes along the way. My first year (2018) was a disaster: I spec'd a controller that was technically compatible but practically useless for the load profile. Total blown budget? Roughly $4,200 across three projects before I figured out what I was doing wrong. Now I maintain our team's internal checklist to make sure nobody repeats my errors.
Who This Checklist Is For
If you're a system integrator, installer, or commercial solar operator configuring an off-grid or backup power system with Morningstar controllers (especially the TriStar MPPT) — this is for you. You've got the hardware. You've got the panels. You've got the battery bank. But something's off: the controller isn't hitting its rated output, the system voltage is bouncing around, or you're seeing weird efficiency drops.
This is a 5-step checklist I use every single time before commissioning a new site. It's saved me from at least four callbacks in the past 18 months.
Step 1: Verify Your Voltage Headroom (Don't Trust the 'Max' Rating)
Here's where I made my first $1,200 mistake. Everything I'd read about MPPT controllers said: match the array voltage to the controller's max input rating, and you're golden. In practice, I found the opposite is closer to the truth.
The TriStar MPPT has a max PV input voltage of 150V (for the 150V model) or 300V (for the 300V model). On paper, that means you can run an array up to 150V. But here's the kicker — that's the absolute maximum, not the operating sweet spot. Cold morning temperatures in winter can push your array voltage 10-15% higher than the rated Vmp. If you're right at 150V on a mild day, a frosty morning will trip the controller into overvoltage protection. No power. Frozen pipes. Angry client.
My rule now: size the array so the theoretical Voc at the lowest expected temperature is at most 85% of the controller's max input voltage. For the TriStar MPPT 150V, that means keeping Voc under ~128V. For the 300V model, under ~255V.
Lesson learned: A controller that's protecting itself isn't making power.
Checkpoint before you wire: Use the manufacturer's Voc temperature coefficient for your panels, calculate the coldest day temps for your site, and verify you haven't exceeded 85% of the controller's rating. I know it sounds conservative, but it's way cheaper than a service call.
Step 2: Categorize Your Battery's Charging Curve (Not All 'Lead-Acid' Profiles Are the Same)
This one still embarrasses me. I assumed — wrongly — that the default charging profile for the TriStar MPPT would work well enough for any flooded lead-acid battery. The controller ships with a generic 'sealed' profile. That worked okay for the first couple of months. Then the battery bank started losing capacity. Faster than expected. Way faster.
I'm not a battery chemist, so I can't get into the electrochemistry. What I can tell you from an install perspective is this: the absorption voltage, float voltage, and temperature compensation coefficient need to match your specific battery's datasheet, not a generic profile. For example, Trojan flooded batteries typically want a higher absorption voltage (2.45V/cell at 25°C) than some Rolls batteries (2.40V/cell).
Learn from my failure: Never rely on the factory default profile for a revenue system. Program the TriStar MPPT from the MSView software or the local display with the exact parameters from the battery manufacturer. Take the 15 minutes. It's worth it.
This gets into warranty compliance territory — not my area. I'd suggest consulting the battery manufacturer before you deviate from their spec, especially if you care about the warranty.
Step 3: Don't Oversize for 'Peak Power' — Oversize for 'Continuous Load'
I can already hear the pushback: but the pumps only run for 5 minutes at a time, so a smaller controller should be fine. Listen, I made this exact argument to myself on a project in 2021. Spec'd a TriStar MPPT 45A for a system with a 2HP well pump (surge current ~70A for 3 seconds). Technically, the pump's continuous draw was only 12A. I figured the controller's overload protection would handle the surge.
It handled the surge. For about 6 months. Then the capacitors started bulging. $890 diagnostic fee plus a replacement controller under warranty (barely). The root cause? The controller wasn't designed for repeated high-current surges — it was designed for continuous solar charging. Every time the pump started, the controller saw a voltage dip and tried to compensate. Over and over.
Per NEC 690.8 (2023), inverter and controller sizing should consider the maximum continuous load, not just the average. For Morningstar controllers, I now use a 1.25 safety factor on the continuous load current. If your load draws 40A continuous, spec the 60A controller. Period.
Checkpoint: List every load that will run for more than 5 minutes at a time. Sum their currents. Multiply by 1.25. That's your minimum controller current rating.
Step 4: Verify the Communication Path Before You Close the Panel
This is the one that gets everyone. The TriStar MPPT comes with a serial (RS-232) port as standard, and you can add the serial-to-Ethernet adapter for network monitoring. In my second year, I installed a pair of TriStars at a telecommunications site. Wired everything. Closed the panel. Powered up. And… nothing from the monitoring software.
Turns out, the off-the-shelf Ethernet cable I used didn't have the right pinout for the Morningstar adapter. The adapter expects a crossover configuration on certain pins. A factory-fresh cable from the hardware store didn't work. I spent hours remote-diagnosing before driving back to site — 3 hours each way — just to swap a cable.
Lesson: Always verify the data path with the Morningstar MSView software before you finalize the installation. Use the cable specified in the user manual (Part Number: MSC-COM-ETHERNET-ADPT). And test it. On site. Before you leave.
This was accurate as of early 2024. Morningstar may have updated their adapter compatibility since then — verify with their tech support before you buy third-party cables.
Step 5: Measure Twice, Cut Once — Then Measure Again
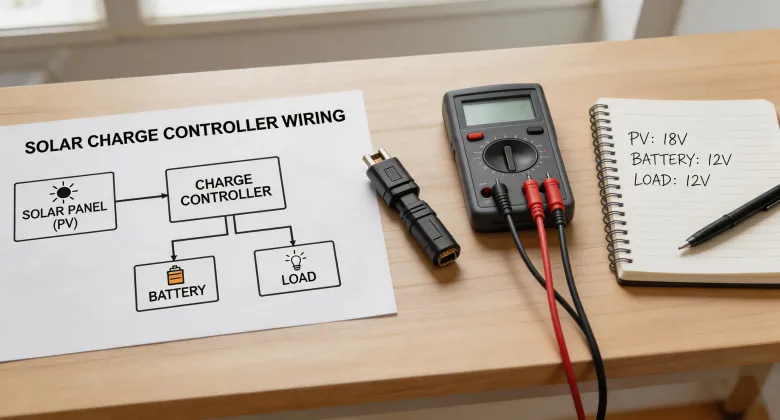
I saved this one for last because it's the most boring — and the one most installers shortcut. The TriStar MPPT has terminals for PV+, PV-, Battery+, Battery-, and Load+/Remote. They're clearly labeled. But I've seen at least three systems where the installer swapped the battery and PV connections, resulting in the controller powering up but refusing to charge.
Why? Because the internal logic sees reverse polarity or the wrong voltage source and shuts down. No damage, but a confusing no-power situation that wastes hours.
My fix: use a multimeter to verify voltage at every terminal before you connect it. Check polarity. Check for shorts. Check for loose wires. Take photos at each step. It sounds tedious, but I promise you it's faster than the confusion that follows a wrong connection.
Final checkpoint: Before you power on, disconnect the PV array and battery bank. Confirm all connections with a multimeter. Then reconnect battery first, then PV. Always battery first. It's in the manual for a reason.
Common Mistakes to Watch For
- Ignoring the 'Snow' Factor on Voc: If your site gets snow, reflected light can push voltage even higher than ambient temperature alone. I've measured 8% higher Voc on a snowy ground-mount compared to a clear day at the same temperature.
- Using the Wrong Battery Sensor: The TriStar MPPT's RTS (Remote Temperature Sensor) is optional but critical for extreme climates. If you skip it, the controller assumes 25°C all the time. Your battery will overcharge in summer and undercharge in winter. Don't skip the $30 sensor.
- Not Accounting for Wire Drop: Voltage drop between the panel and the controller matters more than you think. At 20A and 50 feet of 10 AWG, you're losing about 2% — but at 100 feet, it's almost 4%. That's lost power you paid for. Use a wire size calculator (Southwire has a good free one) and upsize if needed.
Disclaimer: I'm not a certified electrical engineer. This gets into site-specific engineering which is outside my scope. Always consult a licensed professional for final system design.
This checklist was accurate as of Q1 2025. Morningstar occasionally updates their controller firmware and software. Check their support portal for the latest documentation before you commission a new system.