I've been installing off-grid and backup solar systems for about 7 years now. When I first started, I thought a charge controller was basically a smart switch. Plug in the panels, hook up the battery, and let the MPPT magic happen.
I was wrong.
In my first year (2017), I nearly fried a $2,000 battery bank because I misread the specs on a Morningstar Tristar MPPT. The client wasn't thrilled. I ate the cost of replacing the BMS. That mistake alone cost me about $890 and a week of reputation repair.
Since then, I've made maybe 6 or 7 significant errors across different projects—some small, some expensive. This article is the checklist I wish I had back then. It's focused on Morningstar gear (specifically the Tristar MPPT series), but the logic applies to most professional-grade solar charge controllers.
If you're a system integrator, an experienced DIYer, or just someone who doesn't want to learn the hard way, this is for you. Here are the 3 mistakes I made, and the checklist that stopped me from making them again.
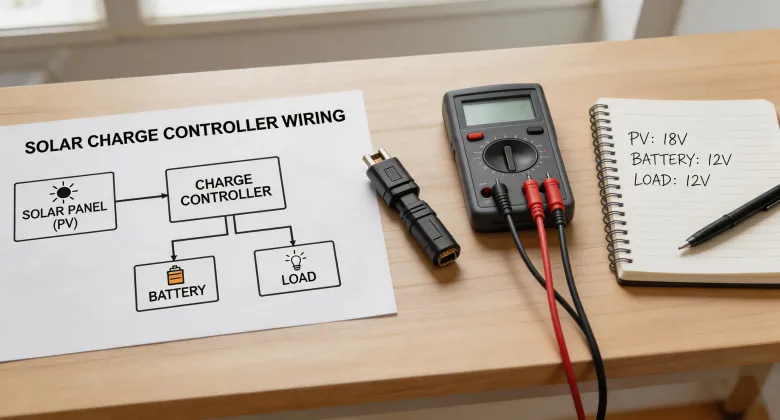
Mistake #1: Ignoring the Temperature Sensor
This one sounds boring. I know. Temperature compensation sounds like the kind of thing you skip to get the system online faster. I certainly thought that.
When I first installed a Tristar MPPT 60A for a remote cabin, I skipped the remote temperature sensor (RTS). The battery bank was a 48V lithium-ion setup (LFP, 5.2 kWh). I figured the BMS would handle everything. The Tristar was set to the default voltage parameters, and I called it done.
Three months later, the battery voltage was chronically low. The BMS kept kicking in to protect the cells, and the inverter kept tripping off. The client complained about the lights flickering. I went back and checked everything. The problem: the charge controller was over-compensating for cold temperatures (it was winter), but because there was no RTS, it was using a default temperature curve meant for lead-acid, not LFP. The result: undercharging by about 4% daily.
Four percent doesn't sound like much, but over 90 days? That's a significant deficit. The battery never got a full charge. Lesson learned.
The Fix (Step 1 of the Checklist)
Install the RTS. Every time. No exceptions. For Morningstar Tristar units, the RTS is a $20 part. It takes 5 minutes to wire into the controller. If you're using a lithium battery, this is non-negotiable. The Tristar's default temperature curve is for lead-acid. Without the RTS, you're guessing.
Configure it in the controller. After installing the RTS, go into the Morningstar TrakStar software or the local display and enable temperature compensation. Set the battery type to the correct chemistry. This takes 2 minutes. Do it before you leave the site.
Mistake #2: Oversizing the PV Array (The 'More is Better' Trap)
Here's a mistake I see a lot: people assume you can throw more solar panels at a charge controller and it'll just clip the excess. For an MPPT controller, that's mostly true. But for a Morningstar controller? There's a limit.
I once sized a system for a small commercial building with a 24V battery bank. The client wanted to add three extra 400W panels to an existing 2.4 kW array. The Tristar MPPT 60A can handle up to 1200W at 24V (rated output: 60A × battery voltage). The total array was going to be 3.6 kW. I thought, 'The controller will just clip the extra power. No big deal.'
Big mistake. The Tristar MPPT does have a maximum input voltage and a maximum input power rating. For the 60A model, the absolute maximum PV input power is 1600W at 24V (per the datasheet). I was trying to feed it 3600W. The result: the controller went into protection mode repeatedly on sunny days. It basically shut down for 10-15 minutes at a time, then restarted. This cycle of restarting killed the system's efficiency and actually damaged the controller's output stage over a period of 6 months.
Cost of replacing the controller: $450. Plus the client's lost time. Plus my embarrassment.
The Fix (Step 2 of the Checklist)
Check the datasheet before you wire. For any Morningstar Tristar MPPT, know this:
- At 12V: max PV input is 800W (for 45A and 60A models).
- At 24V: max PV input is 1600W.
- At 48V: max PV input is 3200W.
Use a string sizing tool. Morningstar has an online string sizing tool. Use it. It'll tell you exactly how many panels in series and parallel you can use. Don't guess.
If you need more power, use a second controller. You can parallel multiple Tristar units on the same battery bank. It's easy to configure. Just stop trying to cram 3.6 kW into a 1.6 kW limit. Trust me.
Mistake #3: Assuming 'Auto-Select' Works Perfectly
Morningstar controllers have an 'Auto-Select' feature for battery voltage (12/24/48V). On paper, it's great. The controller measures the battery voltage on startup and selects the correct setting. In practice, it's not foolproof.
I once installed a Tristar MPPT on a system that had a 24V battery bank that was already at 75% state of charge (about 25.8V). The controller auto-selected '24V' and started charging. Three weeks later, I got a call that the system was showing a 'Battery Overvoltage' alarm. I went to the site, measured the battery voltage: 29.2V. The controller was trying to charge to 28.8V (typical absorb for lead-acid) and then float, but the load profile caused it to push a bit higher. Then the alarm triggered.
The root cause: the auto-select feature works on initial voltage, not on the battery's full range. If the battery is partially charged at startup, the controller might assume a slightly lower voltage setting than optimal. It's a small error, but compounded over time, it can cause overvoltage events.
I now manually set the voltage parameters for every install. It takes 10 minutes.
The Fix (Step 3 of the Checklist)
Manually configure the battery voltage. Don't rely on auto-select. After powering up the controller, go into the settings menu and force-select the correct battery voltage (12V, 24V, or 48V). This is especially important for lithium batteries that might start at a high voltage (e.g., 27.2V for a 24V LFP at 90% SOC).
Set the absorption and float voltages. For lithium, set the absorb voltage to 28.0-28.4V (for 24V systems) and float to 27.2-27.6V. For lead-acid, use the battery manufacturer's specs. Don't just leave it at default.
The Complete Pre-Install Checklist (What I Use Now)
Here's what I run through on every install. It's not fancy. It works.
- RTS installed and enabled? Yes/No. If no, do it now.
- PV array sized correctly? Check the datasheet. Use the online tool. Don't exceed the max input power rating.
- Battery voltage manually set? Not auto-select. Force it.
- Absorb and float voltages configured for battery chemistry? Don't trust defaults.
- System polarity checked? With a meter. Trust nothing.
- Wiring gauge correct for max current? For a 60A controller, use at least 6 AWG wire for the battery and PV connections.
- All connections torqued to spec? Loose connections cause heat and failure. Use a torque wrench.
Seriously, this list saved me from more screwups. I printed it on a card and keep it in my toolbox.
Final Thought: A Word on Battery Backup Systems
Look, I'm not saying Morningstar controllers are perfect. They're reliable, but they're not magic. If you're integrating one into a home solar battery system, especially a 'how much does a home solar battery cost' scenario, remember that the charge controller is the brain. If the brain makes a mistake, the battery suffers.
I recommend Morningstar gear for 80% of off-grid and backup setups. But if you're doing a super high-power system (like 8 kW+) or a complex multi-inverter setup, you might want a different controller or a system integrator who specializes in that scale. Know your limits. It saves money.
That's it. Go check your setup. Don't make my mistakes.